Weber Tile Adhesive Spotlight: How Long Does Rapid-Set Tile Adhesive Take To Set?
07/02/2024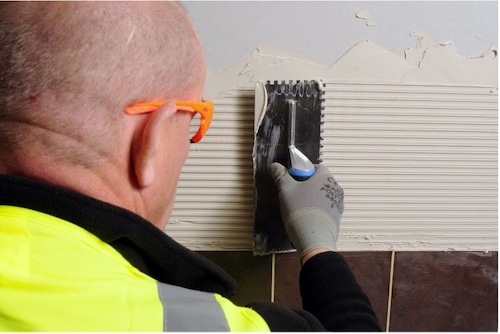
The Pro Tiler Tools team are excited to introduce Weber’s exceptional range of products, as we only sell products we'd use ourselves, so we know you are only ever getting a product that does the best job possible. Some of the key Weber products that we stock at Pro Tiler Tools include:
- Weber Silicone
- Weber Floor Screed
- Weber Primer
- Weber Tanking Kit
- Weberset trade S1 rapid flexible tile adhesive
- Weberset rapid SPF tile adhesive
- SPF tile adhesive
To help you explore the brand further, in this article, we have collaborated with Weber to answer key questions surrounding all things rapid set and standard tile adhesive, tiling primer, and silicone.
How Much Tile Adhesive Do I Need?
To determine how much tile adhesive you need, you'll need to consider several factors, including the size of the tiles, the type of adhesive, and the substrate (surface) you're applying the tiles to as well as how thick you want to lay it.
To give you an example, weberset rapid SPF adhesive is suitable for use at thicknesses of 3-6mm, and at 4.5mm thick, 1 x 20kg bag of weberset rapid SPF will cover approx. 4.5m2.
We recommend you try the Weber consumption calculator. But be aware that it does not take into account wastage, make sure you take any pot life into account when you are mixing up (especially true with rapid-setting adhesives), otherwise, you might end up throwing some away if you can’t work fast enough. Mix up smaller amounts if you are doing lots of cuts or intricate work (or if you have a chatty customer!).
Remember, it's crucial to follow the manufacturer's recommendations for the specific adhesive you're using, as different products may have different coverage rates. If in doubt, consult with the adhesive manufacturer or one of our professional team members for more accurate guidance based on your specific project details.
How Thick Should Tile Adhesive Be?
Linking to how much tile adhesive you need, how thick your tile adhesive should be depends on the product you use. If you’re using weberset rapid SPF adhesive or weberset trade S1 rapid flexible adhesive, you’d be looking at a thickness of 3-6mm.
How Long Does Tile Adhesive Take To Dry?
The drying time for tile adhesive can vary depending on factors such as the type of adhesive used, environmental conditions, and the size and type of tiles being installed. In general, most tile adhesives will set within 24 hours, but complete drying and curing may take longer.
For a sense of comparison, weberset rapid SPF adhesive works quickly, and you can grout after just two hours, whereas weberset SPF adhesive is slower set and you’d want to wait at least 24 hours before grouting, the benefit of this being that it has a longer pot life and you get extended open time for difficult layouts.
It's crucial to follow the manufacturer's instructions on the adhesive packaging for the specific product you are using, as drying times can vary. Additionally, consider the ambient temperature and humidity levels in the installation area, as these factors can influence the drying time. Warmer temperatures and lower humidity levels tend to expedite the drying process. More time is required for all adhesives if working at lower temperatures or when tiling onto impervious or sealed surfaces.
Always allow the recommended drying and curing times before putting stress on the tiles, such as walking on them or applying grout. This ensures a strong and durable bond between the tiles and the substrate.
How To Mix Tile Adhesive
These are our five go-to steps for how to mix tile adhesive:
- Use a clean mixing bucket, removing any old adhesive from your bucket before adding new.
- Read the bag to understand the correct water addition for each different manufacturer and product requirements.
- Gradually add the adhesive to the correct amount/ratio of clean water and mix to a smooth workable, stiff paste.
- Do not attempt to extend the pot life by adding more water to the mix
- Preferable to use a paddle mixer to ensure a good thorough mix, and to save your arms!
Read More: The Best Tools To Use for Mixing Adhesive
How To Apply Tile Adhesive
Here are our ten steps for applying tile adhesive:
- Check the temperature, do not use tile adhesive at temperatures below 5°C.
- Apply the adhesive onto the substrate covering up to 1m2 at a time (or no more than can be tiled within 30 minutes for standard set, and 10 minutes for rapid set).
- Use a suitable notched trowel to achieve the correct bed thickness (normally 3 to 6mm).
- Large or studded-backed tiles may need back buttering.
- Bed the tiles firmly into the adhesive with a slight sliding and/or twisting action, to ensure good contact.
- It is good practice to lift an occasional tile after fixing, to verify that the required contact is being achieved.
- In wet areas, external areas, and all floors, the final adhesive bed should be free from voids.
- Leave appropriate clearance joints for grouting and make any adjustments within 10 minutes.
- Carefully clean off any excess adhesive from the tiles and joints with a damp sponge or cloth before it sets.
- Leave for the appropriate time before grouting.
What Primer To Use Before Tiling
As a starting point before you start tiling, it’s important to ensure that all surfaces are clean, dry, and free from dust, grease or any contaminating barrier. Once you’ve got your surface clean, tile primer should then be used in the preparation of most substrates before the application of tile adhesives, levelling compounds, and tanking systems as it regulates the porosity of surfaces and offers good alkali resistance and adhesion properties in both wet and dry environments.
Weber PR360 tiling primer is recommended for most walls and floors in wet and dry areas, and should be diluted with clean water according to the ratios given on the datasheet, this is dependent on the substrate (e.g. 1:3 for concrete, 1:1 for ceramic tiles, 5:1 for timber).
You simply need to apply an even coating at a regular thickness with a wool roller or a flat paintbrush, complete coverage of all surfaces is essential.
How Long Does Tile Primer Take To Dry?
When it comes to letting tile primer dry, drying usually takes between 1 and 5 hours at +20°C. It’s worth noting that the drying time can be reduced by heat and good ventilation and extended at low temperatures. But as always, check your product datasheet for accurate information as per the product you are using.
Looking to explore all Weber products? Shop By Brand.
Choosing The Right Tile Adhesive For Your Job
Ultimately, choosing the right tile adhesive can significantly impact the outcome of your tiling projects. Whether you opt for a standard or rapid set, investing in quality tile adhesive will pay off in the long run.
Browse Pro Tiler Tools today to explore a wide range of professional-grade mixing tools, and sign up to our newsletter for exclusive special offers, discounts and promo codes, new product and back in stock alerts and more expert manufacturer insights.
Lastly, don’t hesitate to contact our team of experts should you have any questions, via email at [email protected] or give us a call at 01604 859800.